


Table of Contents
- Step 1: Get Your Dog Comfortable With Paw Handling
- Step 2: Pick Your Tool, Dog Nail Clippers vs Grinder
- Step 3: Find the Quick and Read Nail Anatomy
- Step 4: Hold the Paw and Trim Dog Nails in Small Amounts
- Step 5: How to Avoid Cutting the Quick on Clear and Dark Nails
- How Often to Trim Dog Nails (and When They're Too Long)
- How to Trim a Dog's Nails That Won't Let You
- After the Trim: Dewclaws, Accidents, and Aftercare
- Frequently Asked Questions
Last Updated: October 8, 2026
Step 1: Get Your Dog Comfortable With Paw Handling
Learning how to safely trim dog nails at home starts before you pick up a tool, with your dog letting you touch their feet without pulling away.
Build trust first: a calm dog is a safe dog to trim.
Handle one front paw for a few seconds during a relaxed moment: touch the toes, let go, give a treat. Repeat daily for a week.
- Touch the paw, then release before your dog pulls back
- Pair every touch with a treat or praise
- Keep sessions under two minutes
Most dogs accept paw handling within one to two weeks if you go slow. If your dog flinches, back up a step.
Step 2: Pick Your Tool, Dog Nail Clippers vs Grinder
The dog nail clippers vs grinder debate has one clear answer for beginners: a grinder. It removes thin layers instead of cutting a chunk off, so you have far more control near the quick.
Clippers work for thin, clear nails, but demand a confident squeeze and one wrong cut can hit the quick. Grinders let you stop every second to check progress.
Here's how the two compare:
| Factor | Nail Clippers | Nail Grinder |
|---|---|---|
| Best for | Thin, clear nails | Beginners, thick or dark nails |
| Risk of cutting the quick | Higher | Lower |
| Noise | Quiet | Low hum, some dogs notice it |
| Control | Cut per nail | Gradual, layer by layer |
| Learning curve | Needs a steady hand | Forgiving |
| Cost | $10-$30 for a basic pair | $25-$60 for a cordless model |
| Maintenance | Occasional blade sharpening | Replaceable sanding bands |
Which tool fits your dog
- Small dogs with thin, clear nails: A small scissor-style clipper or a fine-grit grinder band both work. Clippers are faster once you are confident.
- Large dogs with thick nails: A heavy-duty plier-style clipper or a grinder with a coarse band. Thin clippers can crack thick nails instead of cutting cleanly.
- Dark nails: A grinder, because you can stop every second and watch for the powdery ring.
When to skip the DIY route
Some situations call for a professional:

- Your dog is aggressive or panics at paw handling after weeks of cooperative-care practice. A groomer or vet has restraint tools and experience.
- Nails are severely overgrown or curling into the pad. A vet may need to trim in stages over several visits to let the quick recede.
- You see signs of infection, redness, swelling, discharge, or a foul smell around the nail bed.
A groomer nail trim runs $10 to $25; many vet clinics charge $15 to $35. For dogs who truly cannot be handled, a vet can sedate for a full trim, which is safer than a struggle.
Our pick for most owners is the PawSmooth Pet Nail Grinder, priced at $29.99. It runs on a quiet motor, which helps nervous pets stay calm.
Step 3: Find the Quick and Read Nail Anatomy
The quick is the living bundle of blood vessels and nerves inside each nail, running down the center and ending in a pointed tip.
On clear nails, you can see the quick as a pink or red core. On dark nails, you can't see it, so you estimate instead.
Here's how to find it:
- Look at the nail from the side, not straight on
- Find where the nail curves downward
- On clear nails, stop cutting before the pink core
- On dark nails, stop when you see a gray or white ring appear
- That powdery center is the dead nail, and it's your signal to slow down
The dead nail is the hard, hollow outer shell with no feeling.
Step 4: Hold the Paw and Trim Dog Nails in Small Amounts
Hold one front paw steady against your body, thumb on top of the toes and fingers underneath, gentle restraint without squeezing.
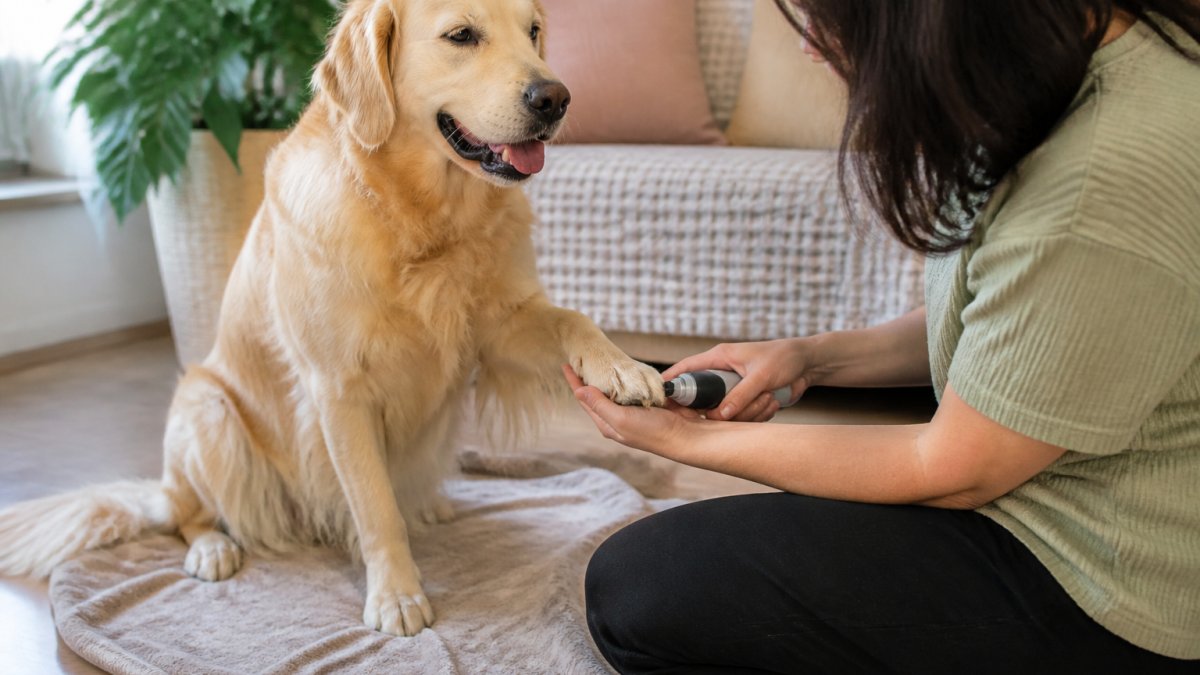
Work at a 45-degree angle for most nails, it follows the natural curve and avoids catching the nail bed. Some groomers cut thick nails perpendicular, but 45 degrees is the safer default.
Go top-to-bottom rather than side to side. Let the tool do the work instead of pressing hard.
- Trim one nail, then check the tip
- Take a break if your dog pulls away
- Skip the nails your dog guards most and come back later
Step 5: How to Avoid Cutting the Quick on Clear and Dark Nails
To avoid cutting the quick, trim less than you think you need and check the tip after every pass. On clear nails, stop before the pink core; on dark nails, stop at the pale, powdery ring in the center.
Clear nails are easy. The quick shows as a pink triangle. Stop a couple of millimeters before it.
Dark nails need a different method:
- Make one small pass and look at the cut surface
- A solid black or gray center means keep going slowly
- A chalky white or gray ring means stop
Do one nail, then check the tip with your finger: sharp means one more light pass, smooth means you're done.
What to do if you cut the quick: a step-by-step first-aid sequence
Even careful owners nick the quick sometimes. What matters is the first two minutes. Here is the sequence most veterinary technicians follow:
- Stay calm and keep your voice steady. Your dog reads your tone. A panicked reaction makes the next trim harder than the injury itself.
- Apply direct pressure. Press a clean cloth, gauze, or paper towel firmly against the tip of the nail. Hold it for a full two to three minutes without lifting to check. Peeking too early restarts the bleed.
- Use styptic powder if you have it. Styptic powder (the same type sold for shaving nicks) or a styptic pencil stops most minor bleeds faster than pressure alone. Dip the nail tip into the powder, then apply pressure for 30 to 60 seconds. If you don't have styptic powder, cornstarch or flour packed onto the tip works as a backup.
- Keep your dog still and quiet. A dog who runs around after a quick injury can knock the clot loose. Sit with them for a few minutes.
- Rewatch the nail for the next 24 hours. A small amount of oozing is normal. A nail that keeps bleeding, swells, or smells bad is not.
Why the quick bleeds so much
The quick contains a small artery and dense capillaries, so a tiny cut looks dramatic. The nail doesn't clot like skin, so pressure, not air, stops the bleed. Never use a cauterizing tool or hot match on the nail; it damages the nail bed and risks infection.
After a quick injury
End the session immediately: treat your dog, put the tools away, and don't attempt another nail that day. Wait two to three days, then start with a nail far from the one you nicked.
Owners who injure the quick once often avoid trims altogether, and the nails grow long enough to affect the dog's gait. The fix is to slow down, use a grinder that removes thin layers, and stop while the nail still looks slightly long rather than risk a second nick.
How Often to Trim Dog Nails (and When They're Too Long)
Most dogs need a trim every three to four weeks. Active dogs on concrete may stretch to six weeks; dogs who mostly walk on grass or carpet need it closer to every three.
How do you know nails are too long? Clicking on hard floors means the nails touch the ground when your dog stands.
- Clicking on tile or hardwood: time to trim
- Nails curving toward the floor: overdue
- Nails curling into a full circle: see a vet or groomer
Puppies need shorter, more frequent sessions. Their nails grow quickly and their quicks sit closer to the tip, so take off very little each time.
How to Trim a Dog's Nails That Won't Let You
If your dog won't let you near their paws, stop forcing it, forcing teaches your dog that nail care means fear, making every future session harder.
Try these steps instead:
- Switch to a grinder, which many dogs tolerate better than clippers
- Trim just one nail per day and reward heavily
- Use a lick mat with peanut butter to distract your dog
For fearful or reactive dogs, this slow approach is called cooperative care. Your dog learns they can walk away, which lowers their fear over time.
If your dog still panics after weeks of practice, book a professional groomer or your vet.
After the Trim: Dewclaws, Accidents, and Aftercare
Check every nail when you finish, including the dewclaws. They sit higher on the leg, grow faster, and curl inward, they can dig into the skin if you skip them.
Run your finger over each tip. Sharp edges catch on fabric, so smooth them with one light pass of the grinder.
If you did cut the quick, watch the nail for a day. Clean it gently and keep your dog from licking it too much.
At Pawsome Finds, we built our grooming lineup around one goal: making at-home care calm instead of scary. The PawSmooth Pet Nail Grinder is quiet, has an LED light for visibility, and offers multiple speeds and openings for dogs of all sizes.
Frequently Asked Questions
Are dog nail grinders better than clippers?
Neither is universally better; each suits different dogs. Clippers remove nail length fast but can crush thicker nails and leave sharp edges. Grinders, like the PawSmooth Pet Nail Grinder ($29.99), smooth the nail as they shorten it, run quietly, and have an LED light to help you see the nail, which many nervous dogs tolerate better. If your dog has thick nails or hates the sound of clipping, a grinder is often easier. If your dog has very thin nails or you need speed, clippers work well.
How do you avoid cutting the quick when trimming dog nails?
Work in small amounts and check the cut end after each pass. On clear nails, stop when you see a pink center. On dark nails, stop when a gray or white oval appears in the center of the cut surface. Trim at a 45-degree angle, take off thin slices rather than one big cut, and keep treats handy. If you are unsure, stop early; you can always take more off next time.
What should you do if you accidentally cut the quick?
Stay calm and apply styptic powder or cornstarch to the nail tip with light pressure for 30 to 60 seconds. If bleeding continues after 10 minutes, call your veterinarian. Give your dog a treat and a break, then end the session for the day. Avoid trimming that nail again for about a week, and check for swelling or limping in the following days.
How can you trim a dog's nails if they won't sit still?
Break the job into tiny sessions: one nail, then a treat and a break. Practice paw handling and the sound of the tool when you are not trimming. Use a quiet grinder like the PawSmooth Pet Nail Grinder, which has a low-noise motor and multiple speed settings, and try a lick mat with peanut butter to keep your dog occupied. If your dog panics or snaps, stop and ask your vet or a groomer for help.
Trimming your dog's nails at home takes patience, the right tool, and a slow hand. Start with paw handling, choose a grinder if you're new to this, and never rush the last nail. Pawsome Finds makes it easier with a quiet grinder, an LED light for clear visibility, and adjustable speeds for every paw size. Get started with Pawsome Finds and turn nail day into a calm routine your dog actually tolerates.